Guillow’s Fokker Dr 1 – The Plans
I’ve finally started the build log of the Fokker Dr 1. I’ve done well…….managing to put off building this model for almost two years. This is going to be an interesting build……the triple decker wings is something I’ve never attempted in wood. The Spitfire Mk 1 was the first stick and tissue I’ve attempted since my younger days, back in the 70’s. Guillow’s is the leading company and is still in existence. Comet was another brand that I have tried and succeeded with, but whether these kits are still available, I have not checked on, or done any research. I do know that they can be found on websites that sell older kits and models. http://www.oldmodelkits.com/ is a site that I window shop…….I have bought kits from them and found them to be excellent. For those who have never built one of these models, your probably wondering what goes into building one. Good plans are important for a successful and enjoyable experience. Guillow’s supplies a good set of instructions. I suggest buying or making a build board out of pine wood, that is to the dimensions of the plans sheet. Make sure that it is level and flat……..for mine, I used a belt sander to insure a flat surface. Simply lay the plan sheet over the board, and lay a sheet of clear plastic wrap over the plans. This will keep glue and paints off of the plans and prevent the model from sticking to it. The plans can be used later to build another as a scratch build, should you wish to do so.
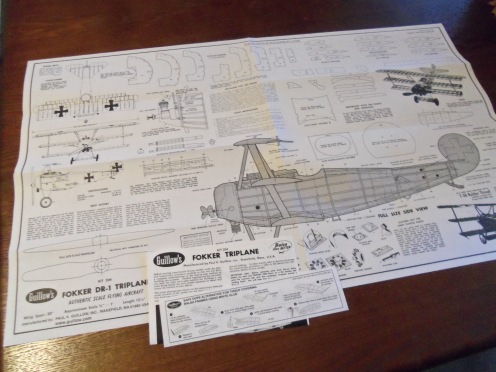
The front side gives you the information you’ll need, plus specifications to alter the model for gas engine. The kit is presented as rubber powered for the beginner. If you wish to build it as a static model, there is a diagram for making a wooden propeller, in the event you don’t want to use the supplied plastic one. There are also 1:1 scale diagrams of the fuselage and wing parts, for scratch building.
Decal placement for the model is also illustrated here.
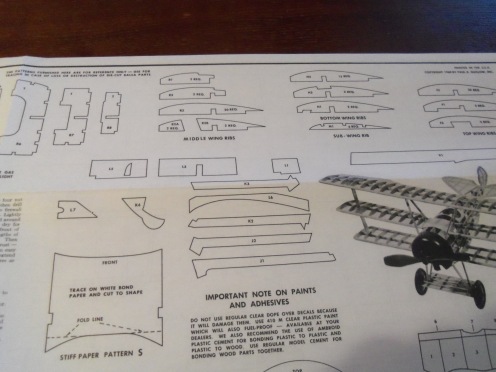
As mentioned, the plans supply diagrams for spare parts for scratch building the model, or if a part becomes damaged. There are also paper coverings for certain areas of the fuselage. These parts can be made from thicker material if needed.
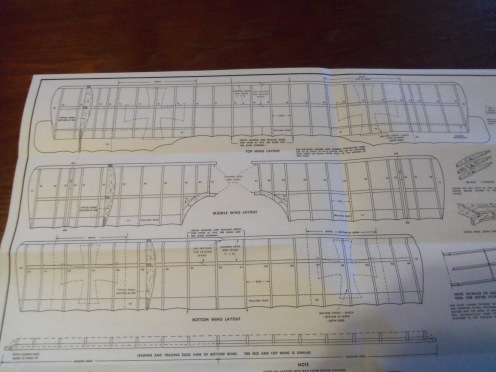
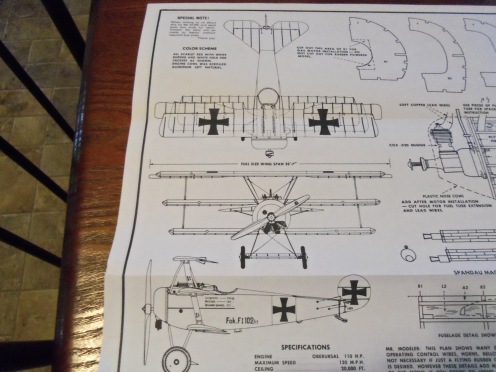
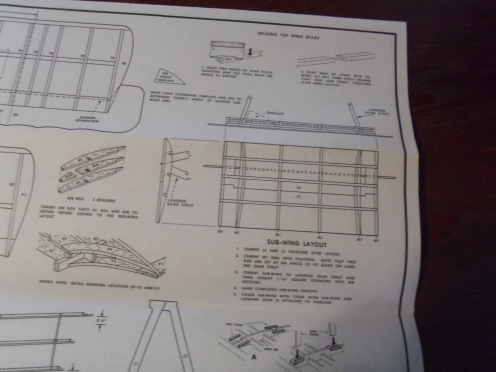
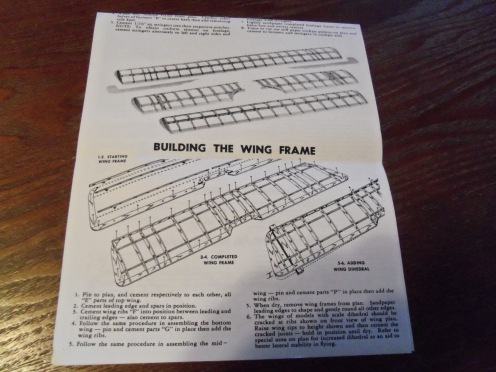
On the flip side of the plans, here are the diagrams of the wings. The wings will be built, using these diagrams as a template. At the very bottom of the picture, shows the dihedral of the wings……there is a diagram shown, in the event that some dihedral may be needed, if you choose to fly the model.

The fuselage and rudder diagrams……again, they will be built to these diagrams.
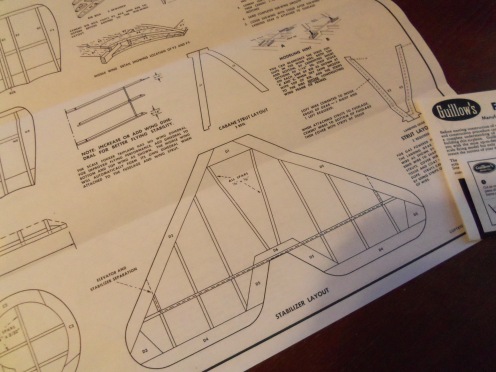
This shows the stabilizer wing{s}, the cabane struts, and the landing gear struts. The landing gear has a specialized wing of it’s own, that is also shown on the plans. The dihedral adjustments is also shown, if needed.
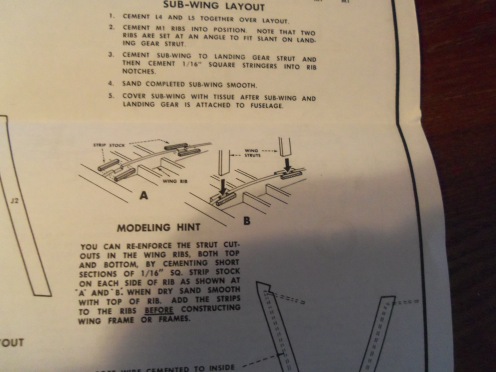
Believe it or not, I did this with a Comet kit, I had built in my youth. I found it interesting that this same reinforcement, is shown in the plans. It confirmed to me, that I had the right idea. I did this with a Comet kit, I had built in my youth…..a Piper Cub. It was a very good flyer.
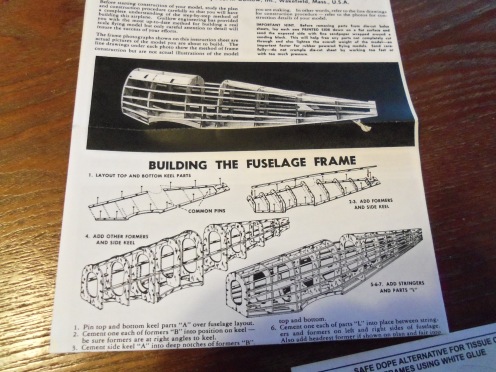
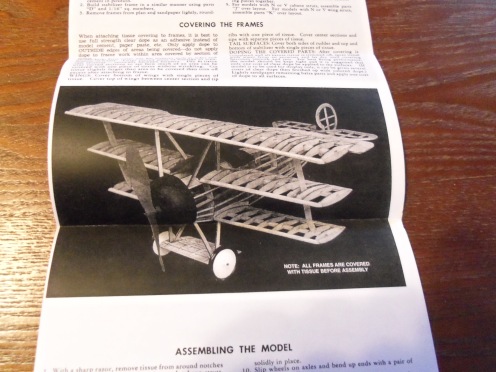
As shown in the first picture, other bits of instruction is included with the kit. I found it interesting that the illustrations pertain to this kit. As shown, if dihedral is to be built into the model during it’s construction, it will be clearly detailed in the assembly process. The model can be tissued, or shown as a skeleton if you prefer. There are diagrams and instructions for this assembly as well. Guillow’s is committed in the assurance of a successful build.
Fly’em High!!!
